DAJ Fine Woodworking <br />603-356-9080
  • Welcome
  • Blog "THE BOARD ROOM"
  • Architectural Millwork
    • Casework & Cabinetry
    • Entertainment centers
    • Closets
  • Furniture
  • Contractor services
    • Commercial
  • Testimonials
  • Artistic Pieces
  • Bio
  • Contact
  • For sale;
  • coverage areas

End of phase #1

11/28/2012

0 Comments

 
Picture
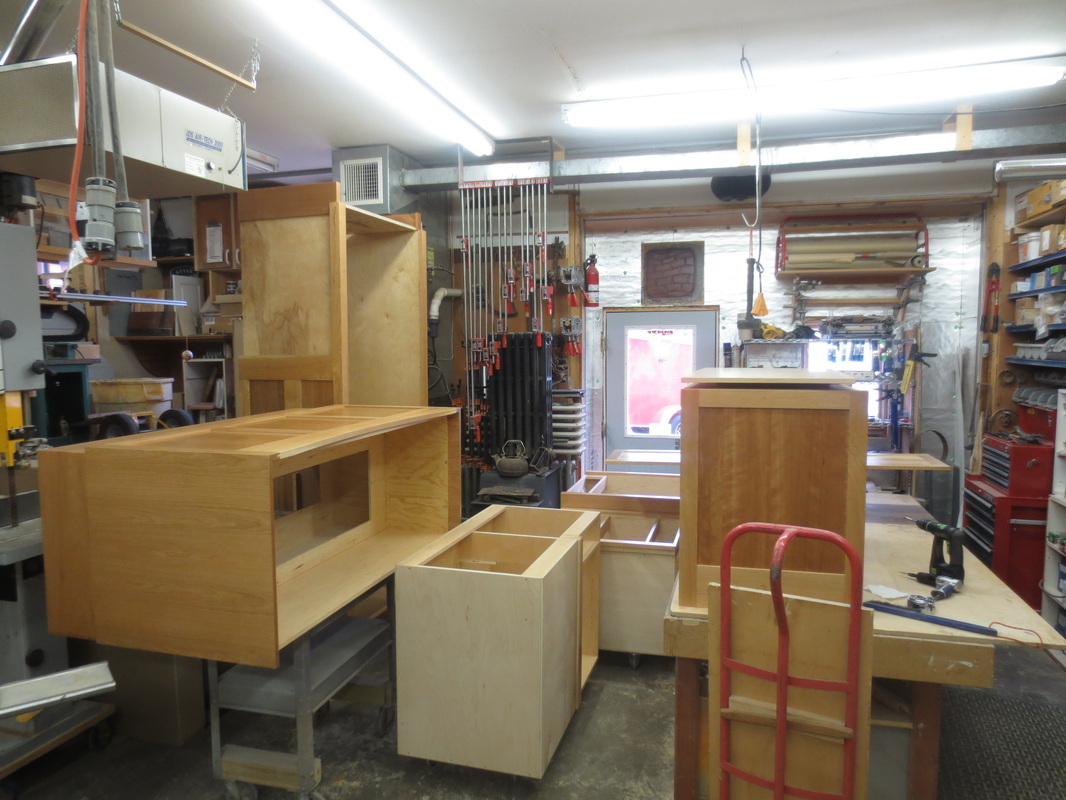
All the parts and pieces are sanded and prepaired for the finish. Now I go Into spraying mode.
I first apply a Lacquer based sealer that I have specially mixed to add a little bit of tint which gives the wood a little bit of a warm tone. (if I were doing a maple or something that required a "water clear" finish I would use a completely different product)
After the sealer is dry I hand sand with a 220 Grit sand paper, vacuum off the dust and spray with a Conversion Varnish. (a two part mix of varnish and catalyst as a hardener)

Picture
On the exposed facs and surfaces I actually apply two coats of the varnish, one right after the other while they are still in the spray booth.
 The finish I prefer is a "dull sheen" which gives a nice hand rubbed look but the protection of a sprayed top coat.

Picture
After the finish has a day or two to cure I install the drawer slides and drawers and this project is ready for installation.
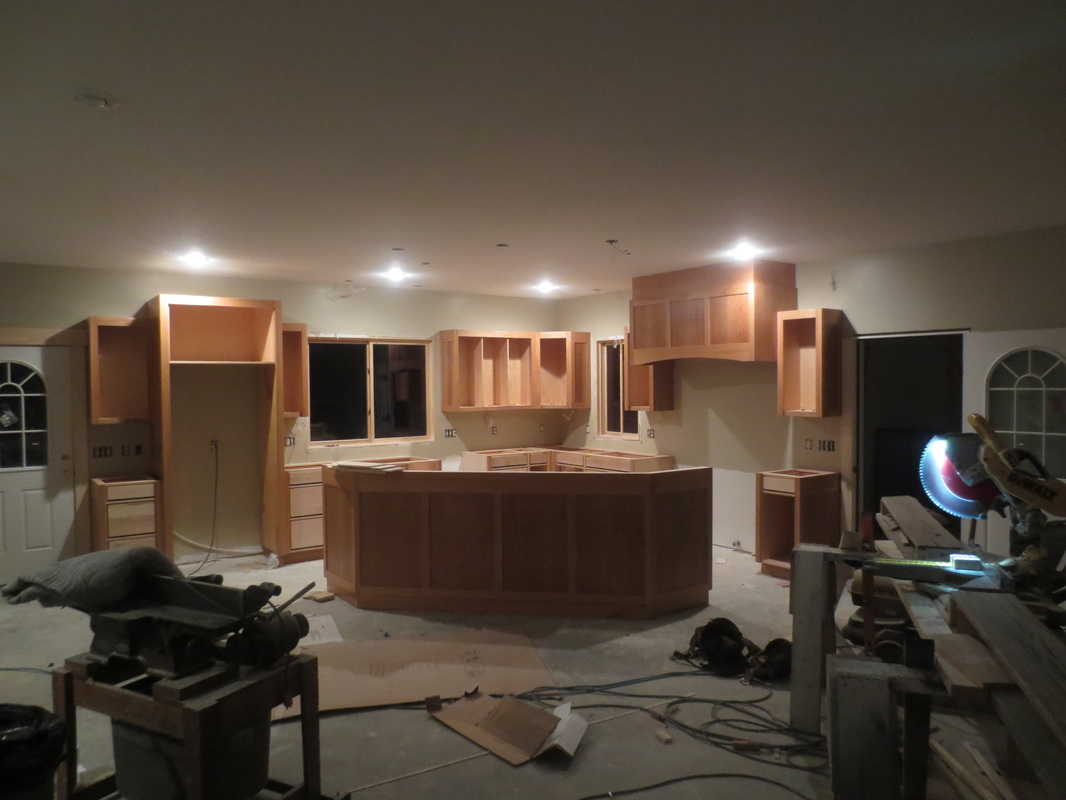
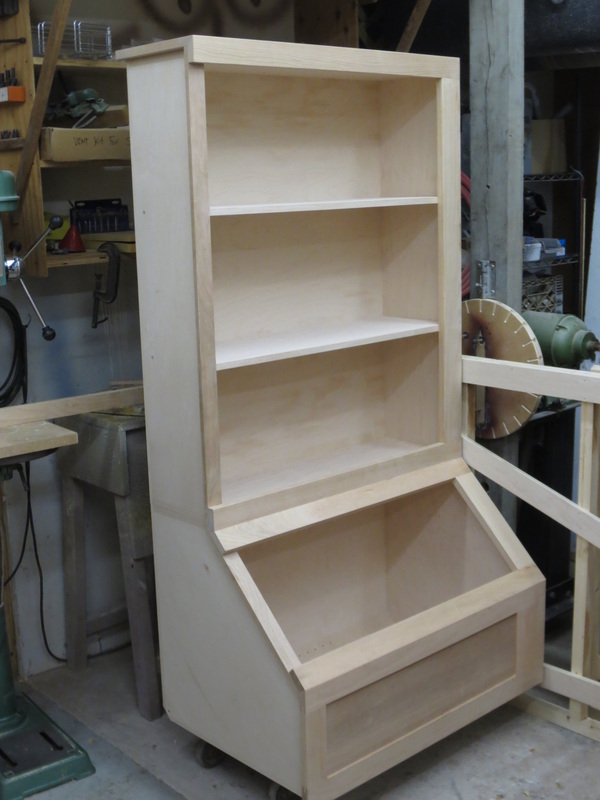
In this case The client wanted to hold off on the door and drawer fronts, and some of the trim details till a later date.  (I'm glad that I was able to accomodate them with this, try to do that with another cabinet manufacturer) 
"So we Loaded up the Truck and moved to Beverly" Jerico that is! And after a long day this was the result.  Phase # 1 Complete.

0 Comments

Cutting Corners

11/18/2012

0 Comments

 
Picture
In a project like this it requires alot of mitered corners of varying degrees of angle.
Years ago I came across this simple little process that makes doing these types of joints fairly simple to achieve.
In this photo you can see that the panel section of this wall is actually wrapped around the end of the wall as well as the base kick being wrapped around.

Picture
I'll use the base kick as an example of this process.
1st pre-cut the parts in question, as you can see there are three parts that will get wrapped, each cut with a 45 degree bevel on the ends.
 I place these parts face up with the points of the mitres touching, then using a clear packing tape I tape over the joint and the tape now acts as a hinge.
I flip the parts over as you see in the above picture, then apply glue to the inside of the joint and fold the whole assembly around the end of the wall, clamp in place and wait for the glue to dry.
Whala! a nice clean and solid joint, no nails , mortises, fasteners etc. Some sanding and ready for finishing.


Picture

The beauty of this system is that the tape dosen't care what angle you use.
Here you can see a 45 degree corner done in the same fashion.
A word of caution, Inside corners are a little more difficult due to the fact that the glue squeezes out of the joint as you fold it together so use minimal glue on a inside Miter.
Happy Mitering

0 Comments

Let's Face It.

11/15/2012

0 Comments

 
Picture
We've discussed all the parts involved in the fabrication of the Cabinet Boxes.
Now I start to work up the face frame and finished end panel parts. ( basically all the Cherry components that get attached to the boxes.)
The part count for the face &  panels is 153 this gives us a total of 331 parts on the list.
In this shot I have taken rough cherry stock flattened it, thickness planned it, straightened one edge, ripped it to the correct width and jointed the ripped edge to remove the saw marks on pieces that will have both edges exposed.

Picture
From here these dimensioned pieces get cut to the exact length and beveled if necessary, tennons cut into the ends of some and groves or mortises into others, and the list goes on.
Pieces get assembled sanded and applied to the cabinet boxes.

Picture
this is a wall unit actually standing on it's end, sanded and ready for finishing. (you're looking at the bottom of this unit.)

Picture
Other pieces get assembled into components that are part of the kitchen design. Here is the Island back wall that will be the eating area of the kitchen. ( this space is designed to accomodate 6 guests at the bar top.)

I'm almost ready to start the finishing process, More to come:

0 Comments
    Picture

    author

    I've pretty much had my hands on wood for the most part of my Life. Started in High school, on Marthas Vineyard Mass.Worked under a Father and son Partnership that taught me the valuable foundation of what High End work really is.
    I've taken those fundimentals and put my own spin on things. Today (some 36 years ago as I write this )My shop is located in Northern New Hampshire, where I have followed my philosophy of doing high quality work and delivering more than the
    customer expects.

    Archives

    February 2016
    April 2014
    January 2014
    November 2013
    October 2013
    March 2013
    December 2012
    November 2012
    August 2012
    July 2012
    June 2012
    May 2012
    April 2012
    March 2012

    Categories

    All
    All Decked Out
    And We're Off
    Cherry Kitchen 11 2012
    Cherry Kitchen 11-2012
    Crescent Shaped Cabinet
    Cresent Shaped Cabinet
    Drawer Unit
    Floors
    Flying Desk
    Good Vibes
    Home Sweet Home
    Or On Depends How You Look At Things
    Trade Shows Are Us
    Wall Or Not A Wall

    RSS Feed

Powered by Create your own unique website with customizable templates.